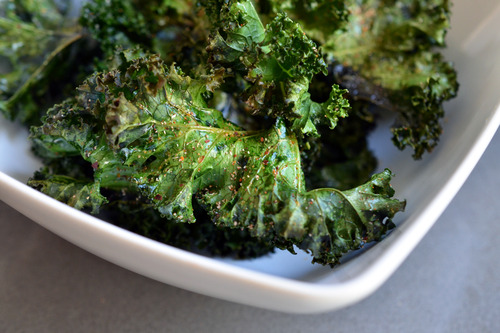
At this point, most of us know kale to be a superfood. Low in calorie and fat, high in fiber, and full of nutrients—including Vitamins K, A, and C, and magnesium—it’s also a powerful antioxidant and anti-inflammatory food, and has more iron per calorie than beef.
Integrating it into your diet, much less your children’s, can be about as chewy as its fibrous green leaves, though.
But wouldn’t it feel good to know you and your children were getting a heart-healthy dose of all those vitamins and nutrients every time a hand was dipped into the snack bowl?
Try turning kale into kale chips. Using ingredients easily found in most kitchens, this snack will be gobbled up by even the pickiest eater—and over time can have a lasting positive effect on your family’s health, too.
Ingredients
Makes 4-6 servings
• 1 good-sized bunch curly green kale (feel free to double the recipe for a larger snack)
• Olive oil, as needed
• Seasonings, as desired (see instructions)
• Sea salt to taste
1. Preheat oven to 325 degrees.
2. Gently remove kale leaves from the stems and tear into large chip-sized pieces—keeping in mind they will shrink slightly when baked.
3. Rinse kale pieces in a colander or salad spinner and let dry completely. Damp kale won’t turn crispy properly one in the oven.
4. Place dry kale in a large bowl and drizzle in a little olive oil. Massage it evenly into the leaves with your hands. If desired, you can apple cider vinegar or seasonings including chili powder, cumin, Cajun seasoning, or—my choice—nutritional yeast. Delicious and full of calcium and B-12, the flavor of nutritional yeast blends perfectly with the kale. Either way, do not add salt yet. It will make the chips soggy.
5. Spread the kale on a couple parchment-lined baking pans without overcrowding or layering. Bake for 12 to 20 minutes, checking the chips from time to time. When you take them out, they should be evenly dry and crisp and just barely beginning to brown.
6. Remove the chips from the oven and allow to cool until they can be handled. Carefully transfer to a serving plate or bowl. Taste first, and if desired sprinkle on a little salt. You may find you don’t need it, though.
7. Enjoy!